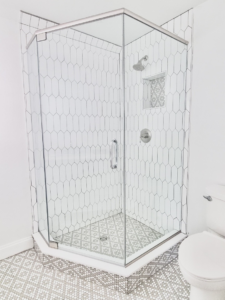
Step 1: Initial Consultation and Measurements
The first step in the installation process is an initial consultation, where our team assesses your bathroom space and discusses your design preferences. Precise measurements are taken to ensure a perfect fit for your custom frameless shower. This step is crucial, as frameless showers require exact dimensions to align correctly without traditional framing support.
Step 2: Choosing Your Glass and Hardware
Once measurements are taken, you’ll select the type of glass and hardware that best suits your style and needs. Options include clear, frosted, or textured glass, as well as a variety of hardware finishes to complement your bathroom décor. Our experts will guide you in choosing the most durable and aesthetically pleasing options for your space.
Step 3: Custom Glass Fabrication
After selections are finalized, your shower glass is custom-fabricated to match the precise specifications of your bathroom. This process ensures that the glass panels fit seamlessly, maintaining both functionality and design integrity. The fabrication process typically takes a few weeks, depending on the complexity of your design.
Step 4: Preparing Your Bathroom
Before installation day, it’s important to prepare your bathroom space. Remove any personal items from the shower area and ensure easy access for our installers. If any additional structural adjustments are needed, such as reinforcing walls or waterproofing, these will be addressed before the glass is installed.
Step 5: Professional Installation
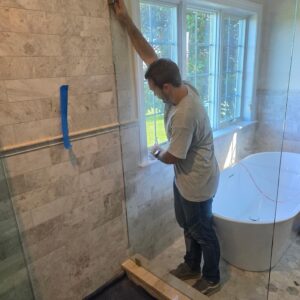
On the scheduled installation day, our experienced technicians will carefully position and secure the glass panels. High-quality, durable hinges and brackets are used to ensure stability. Since frameless showers rely on precise alignment and sealing, our team takes extra care in making sure every panel is perfectly placed and watertight.
Step 6: Sealing and Curing
Once the glass panels are secured, the edges are sealed with a specialized silicone to prevent leaks. This sealant requires a curing period, typically 24-48 hours, to ensure a strong bond. During this time, it’s important to avoid using the shower to allow the sealant to set properly.
Step 7: Final Inspection and Maintenance Tips
After the curing period, a final inspection is conducted to ensure everything is secure and properly aligned. Our team will also provide maintenance tips, including proper cleaning techniques and ways to prevent water spots, to help keep your frameless shower looking pristine for years to come.
Ready to Upgrade Your Shower?
Installing a frameless shower is a transformative upgrade for any bathroom. Maryland Frameless Showers is here to make the process seamless and stress-free. Contact us today to schedule a consultation and take the first step toward a stunning new shower space.